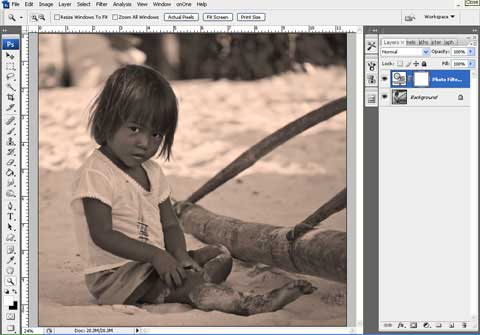
How to Create Sepia Photo in Photoshop CS+
We are so used to seeing photographs in color nowadays that seeing a sepia photo is something like a breath of fresh air. Black and white photos give pictures a romantic quality but sepia photos give a softer appearance. Some people even say that sepia photos feel more alive and elegant often provoking images of a bygone era that still captivates our imaginations.But how do we convert our color photographs into sepia photos? If you are using Photoshop CS and above, creating a sepia photo is pretty simple because of the Sepia Tone setting (photo filters) in the newer versions of Photoshop. So let’s start converting a color photo into a sepia-toned image. I guarantee this will take you less than 30 seconds to come up with your desired final image.
TUTORIAL ON HOW TO CREATE SEPIA PHOTO IN PHOTOSHOP
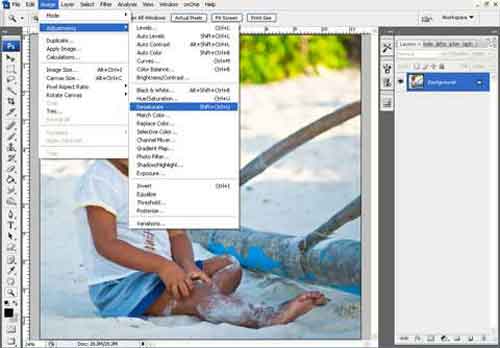
First step: Open your color photo In Adobe Photoshop CS, CS2, CS3 or CS4 and then go to Image> Adjustments> De-saturate (See illustration below). This will automatically convert your photograph to a grayscale version without having to convert, making it possible to add some color.
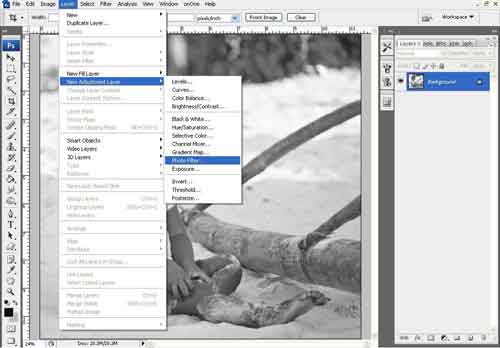
Second Step: Apply Photoshop’s pre-packaged Sepia photo filter. You can perform this by going to Layer> New Adjustment Layer> Photo Filter (See illustration below).
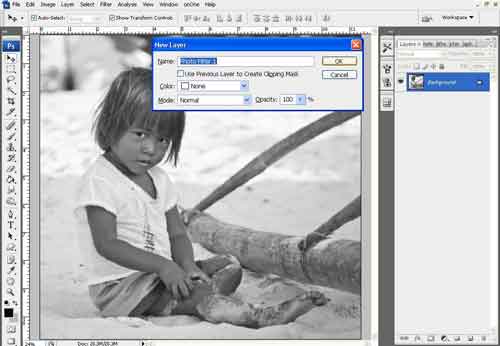
Third Step: Clicking “Photo Filter” above will bring up the “New Layer” dialogue box. In this dialogue box, you should enter the following settings:
Color: None
Mode: Normal
Opacity: 100%
After entering the above settings, click OK.
Fourth Step: After clicking OK, the Photo Filter dialogue box will pop up. Enter the following settings:
Filter: Sepia
Density: 50% (or you may put a higher or lower value here. Whatever looks good to you)
Preserve Luminosity: Selected
(See illustration below)
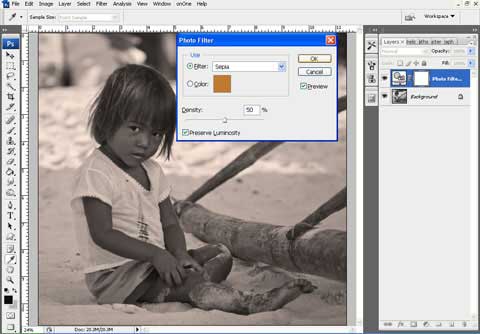
Fifth Step: Click OK (on the Photo Filter dialogue box) and presto! you have a sepia version of your photograph.
